-
Par colybrix le 5 Juillet 2024 à 10:08


Colybrix, thank you very much for your permission that I may translate your tutorials
Tutorial here
***
***
Plugins
Graphic Plus
Mura’s Seamless
AAA Filters
AAA Frames
Alien Skin Eye Candy 5 : Impact
***
Colors
Foreground : #173863
Background : #bccddd

***
***
1 - Open Alpha Lumière de Lune – Window / duplicate (Ctrl D)
We work on the copy
(it contains selections)
Fill with foreground color
Selections - Select all
Open "Paysage 156" - Erase teh watermark
Edit - Copy
Edit - Paste into selection
Selections - Select none
2 - Adjust - Blur - Gaussian blur 35
Effects - Image effects - Seamless tiling - Side by Side

3 - Layers - Duplicate
Effects Mura’s Seamless - Shift at Slant

Effects - Geométric Effects - Skew - Wrap- vertical 25

Blend mode Multiply (on my version 2 Blend mode Overlay)
4 Move to Raster 1
Effects Graphic Plus - Cross Shadow, by default except Intensity 50

Move to Layer Copy of Raster 1 - Edit - Repeat effect Cross Shadow
5 - Layers - New Raster Layer
Fill with the light color
Layers – New mask layer from image – select " NarahsMasks_1738"
Effects - Edge effects - Enhance
Layers - Merge - Merge group
6 - Copy and paste as a new layer "Paysage 156"
Resize 70% all layers not checked
Layers - Duplicate
Pick Tool (k) - Position X -100
Position Y - 123

Selections – Load / Save selection - Load Selection 1 from Alpha Channel
Selections - Invert
Erase
Selections - Select none
7 - Move to Raster 2 (Paysage below)
Pick Tool (k) p Position X 348
Position Y 126

Selections – Load / Save selection - Load Selection 2 from Alpha Channel
Selections - Invert
Erase
Selections - Select none
Move to (Copy of Raster 2)
Layers - Merge - Merge down
Opacity 50%
8 - Move to (Group Raster 2)
Textures Effects Weave (Dark color)

Effects 3D - Drop shadow 5, 10, 100, 10 black color
9 - Copy and paste as a new layer "Paysage 156"
Image – Resize 85%
Pick Tool (k) position X 100
Position Y -89

10 - Blend Mode Hard Light
Layers - Duplicate
Opacity 50%
11 Move to Layer Copy of Raster 1
Effects AAA Filters - Custom
Choose Prewitt, opacity 50%

12 - Layers – New Raster layer
Fill with Light color
Layers – New mask layer from image – select " NarahsMasks_1740"
Effects - Edge effects - Enhance
Layers - Merge - Merge group
Blend Mode Luminance (Legacy) - opacity 77%
13 - Layers and Result


14 - Move to Layer Copy of Raster 1
Layers - Merge - Merge down
Edit – Copy
Edit – Paste as a new image
Save it for later
Layers - Merge - Merge visible
15 - Selections – Load / Save selection - Load Selection 3 from Alpha Channel
Layers – New Raster layer
Fill with Dark color
Effects Alien Skin Eye Candy 5 - Impact - Glass

16 - Effects 3D - Drop shadow 1, 1, 100, 10 black color
Selections - Select none
17 - Image – Add borders
2 pixels – Foreground color
2 pixels – Background color
2 pixels – Foreground color
18 - Selections – Select all
Image – Add borders
40 pixels – any color
Selections – Invert
Edit – Paste into the selection the background image saved in step 14
19 - Effects Graphic Plus -Cross Shadow, same settings in memory
Selections – Invert
Effects 3D - Drop shadow 0, 0, 100, 40, dark color or black
Selections – Select none
20 - Effects AAA Frames - Foto Frame

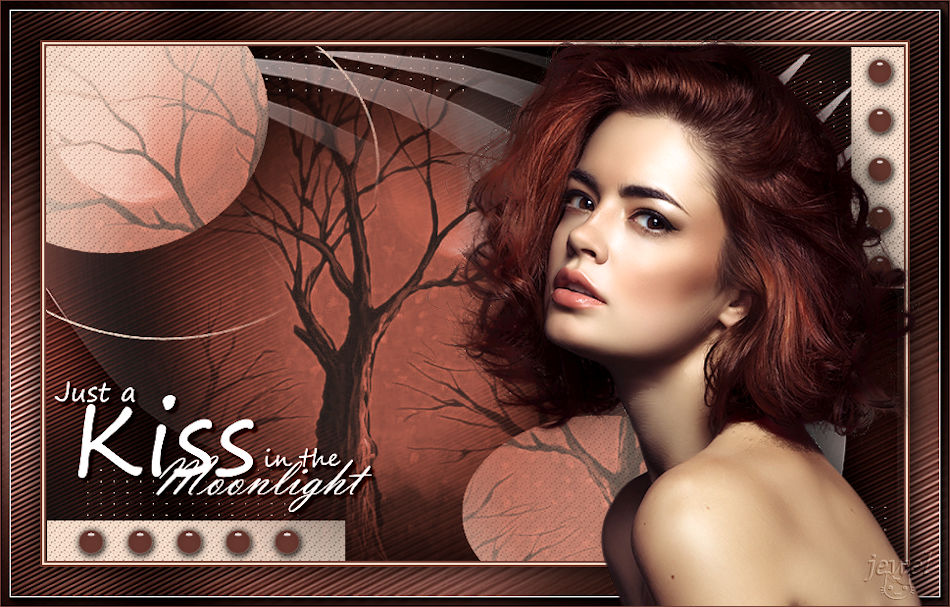
21 - Open "femme821-coly"
Erase the watermark
Edit - Copy
Edit - Paste as a new layer
Resize 74% all layers not checked
Place on the right
Adjust – Sharpness - Sharpen
Effects 3D - Drop shadow 2, 16, 50, 40, dark color or black
22 - Copy the Title
Paste as a new layer
Place at the bottom left (or as you wish)
Effects 3D - Drop shadow 2, 2, 100, 2, black color
Edit - Repeat Drop shadow
Blend mode Luminance (Legacy)
23 - Add your watermark
Image – Add borders
1 pixel – Foreground color
Save Jpeg
If you want, you can send me your version
If you have problems, or you find a not worked link, write to me
Une autre version avec un tube de LB Beatriz

Thank you so much Kika
Thank you so much Paula
 votre commentaire
 Suivre le flux RSS des articles de cette rubrique
 Suivre le flux RSS des commentaires de cette rubrique


